 Advertising across multiple platforms is a great way to increase sales. But how do you know which advertising works, which advertising results are best? Which advertising source brings you the most sales?
Checking the data on each platform individually is time-consuming and inefficient and that usually pushes most of us to guess.
Source; Wikipedia
We’re in the digital age and tracking advertising results is really not that hard.
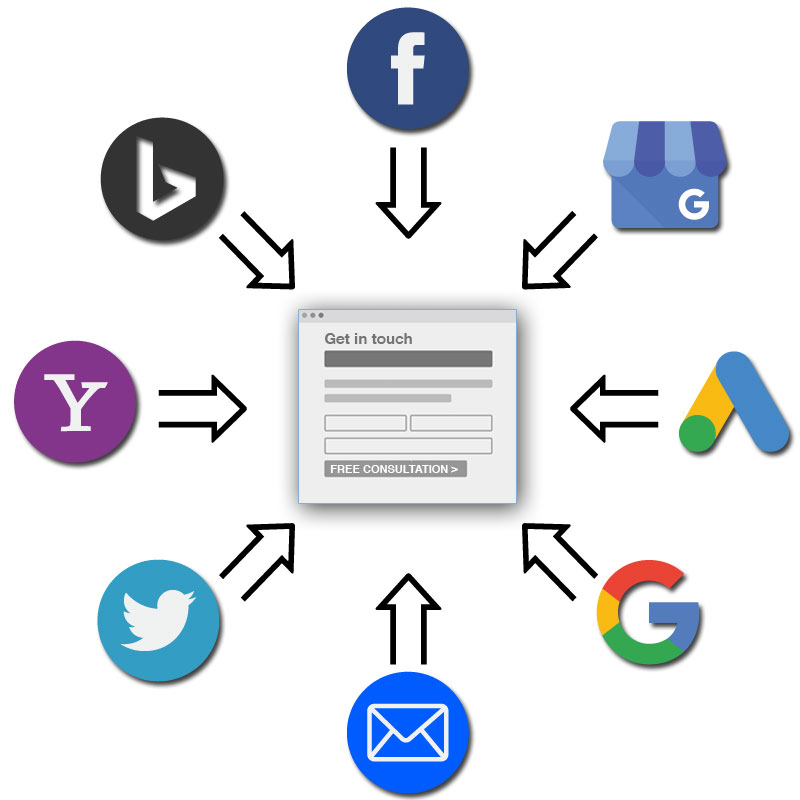
Keep All Your Advertising Results In One Place
It’s best to track all your advertising data in one place such as Google Analytics website tracking application. With just a quick tweak to the link in your ad you can have all your results in Google Analytics.
This way, when you advertise on Google and through social media platforms like Facebook, you can get an at-a-glance comparison of your sales leads from each source.
Three Basics of Advertising Results Tracking
In fact, there are three things that must be in place before I begin any advertising with my customers:
- Goals are set in Google Analytics.
- Google Ads Auto Tagging and Goal Import is set up.
- Facebook and all other online ads are tagged with a UTM code.
Let’s take a closer look at each of these steps.
Google Analytics Goals
Google Analytics’ free website tracking application is the core of your data tracking. This is where you’ll go to view and compare your data.
Here’s how to set this up:
- Set up Google Tag Manager: This free product tracks clicks on your forms. On e-commerce sites, you can enable e-commerce tracking. For Shopify sites, the setting for e-commerce tracking is under ‘Online Store’ under ‘Preferences’. Ensure the ‘E-commerce’ box is enabled.
- Set your goals in Google Analytics: You will find those in the Admin section under the ‘View’ panel.
Google Ads Auto Tagging and Goal Import
Auto Tagging is what enables your Google Ads click and conversion data to be transferred between Analytics and Google Ads.
Here’s how to do it:
- Link your Google Analytics to your Google Ads account: In Google Analytics, go into Admin, and in the ‘Property’ panel, click ‘Linked Products.’ Select Google Ads and input your account number.
- Set up Auto Tagging: Go into your Google Ads account, and under ‘Account Settings’ on the side menu, ensure ‘Auto Tagging’ is set to ‘’
- Import your Goals from Google Analytics to your Google Ads account: Click the wrench icon in the upper right navigation menu, then click ‘Conversions.’ Select ‘Import,’ and your Google Analytics goals should appear. Check off the goals you want to import.
Facebook and other Advertising Tracking
When you compare all your traffic sources against each other in Google Analytics, you can actually see what sources are converting, bouncing, full of new users, and much more advertising results. The Google Analytics screenshot below shows the traffic volume from each source and the number of times a sales lead was generated from that source. What a wonderful instant comparison!
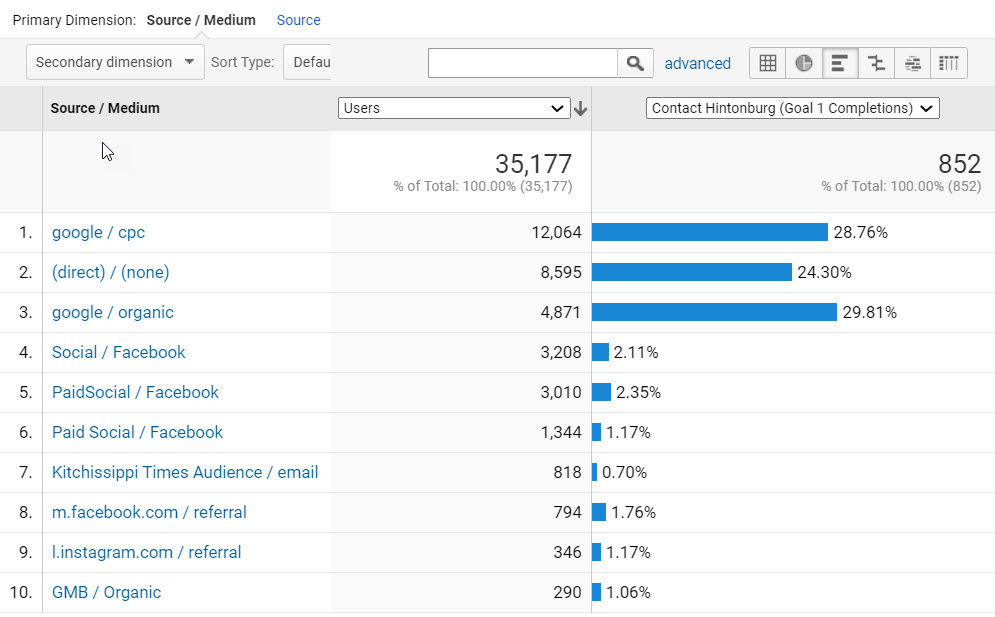
Notice numbers five, seven and ten: PaidSocial / Facebook, Kitchissippi Times (a local newspaper), and GMB (Google My Business) / Organic. None of these are included in Google Analytics by default; they are all third party advertising vehicles.
I track the performance of these advertisements by ‘tagging’ the link to back to your website.
Let’s play tag
A tag is a set of instructions that tells Google Analytics how to classify a link. It’s actually an HTML code called an UTM code that surrounds your link.
Here’s an example of what a tagged link (with HTML code embedded) might look like:
Don’t worry… it’s not as scary as it looks.
Wait it’s much easier…. There’s a free tool to do it for you.
First, here are a couple of useless facts:
- UTM stands for Urchin Tracking Module.
- Urchin was a company that Google purchased many years ago.
Google has built an easy-to-use tool that does all the coding for you. It’s called Google URL Builder, and yes, it’s free!
When you open the Google URL Builder tool, the first thing you will need to do is input your landing page. This is the page you are sending the user to when they click your ad.
Next, there are three more fields to navigate:
Source: The site where the traffic is coming from. For example, Facebook, Google My Business, New York Times, etc.
Medium: This is a broad channel grouping. For example, Social, Organic, Paid, Email, Affiliates, PaidSocial.
Each medium may have many sources. For example Paid Social (representing social media advertising you are paying for) might include sources such as Facebook, Instagram, Linked In, and other social media sites.
Campaign (optional): This is the promotion or product that is being promoted.
Google URL Builder creates your tag as you complete the fields
As you complete the fields, you’ll notice a URL full of %, ? symbols at the bottom of the page. Don’t worry, it all means something. Once you’re done filling in the fields, just copy the URL and past it into your ads.
Some of these URLs might be overly long. I suggest using a URL shortener like Bitly to cut them down to size.
Make sure the link works
When you add your URL to your ads, test it to ensure it links to the correct landing page. Then, check your Google Analytics Realtime traffic sources to test that it is picking up the correct source and medium.
By following these simple steps, you can keep all your advertising data in one place, and quickly and easily see your advertising results.